Long before there was Facebook to distract everyone with an endless supply of bogus urban legends urging you to forward them to all your friends to protect them from the giant alien ants that are handing out GPS tracking keychains so that they can follow you home to give you cancer from a Monsanto product and then demand a do-over on the last election, The Internet had developed a lore.
You'd come across it whenever you decided to pick up a new hobby. There were just certain things that a novice researching something on The Internet would always conclude for various topics.
For instance, revolvers are far superior to self-loaders, and the optimum cartridge for a revolver is the .357 magnum, and the best model of .357 magnum is the Colt Python.
All of that is baloney. Each and every assertion in that internet lore is wrong.
Then, if you decide you really must have a self-loader, The Internet would steer you invariably to the CZ-75. The absolute most bestest self-loader evah. Except no one shoots one. I held one in my hand once at a gun store cuz a friend was interested in getting one due to internet research. You could see the voids in the frame castings. You could practically hear the clerk thinking, "Oh great. An internet shooter."
Oh, and if you wanted a pickup, the Dodge Ram 2500 with a Cummins Turbo Diesel was the only pickup that would last more than five years. It would last 1 million miles with no maintenance other than changing filters.
If you are a novice pipe smoker, and you do a bunch of research on The Internet, you will become absolutely convinced that meerschaum is the optimal pipe material. You'll learn how it doesn't absorb any juices, so it doesn't ever "sour" or pick up a permanent flavor from the tobacco. This means you don't have to dedicate a pipe to each blend of tobacco (I think only hard-core people do this), and you don't have to have seven pipes (one for each day of the week) to let each "rest" for a week to dry out in between smokes. It also stays pretty cool when you smoke it, it's a light material, and of course, it's easily carved into ornate little sculptures. It's just absolutely perfect.
You know, except for that one thing.
It's a little brittle, especially when it gets hot. But a fine internet-trained aficionado knows how to handle it, so this is really only a problem for the proles.
A little brittle. Eggshells routinely challenge meerschaum to fights without any worries of being cracked. People place their finest china around meerschaum pipes to serve as armor. These things are more brittle than a pampered, rich college sophomore who has just converted to veganism and was shocked, shocked! when she stood up in calculus class to state that her answer to the quiz question was only "wrong" because of the patriarchy, and then she heard someone snicker.
Yeah, I busted the hell out of it in short order. Really, just trying to remove the stem to clean it (after it had completely cooled) caused the stem to not just break off, but to shatter into about five pieces. I glued it back together with CA glue (something that it turns out is not recommended cuz no one really knows what kind of toxic out-gassing CA glue does when hot, and the manufacturers of it just tell you, "don't do that.") I smoked it for a while longer, then busted it again the same way.
Well, f---- that. The Internet is a liar. I entered the dark side - I switched to non-optimal pipes made of briar burl.
The nice thing about wood pipes is that you have a built-in excuse to get more of them, given how you're "supposed" to have one for every day of the week and for every blend of tobacco. I started to build a supply (well, really, three).
And then I decided it was time to try to make one myself. I had stumbled across some instructions on that a few years earlier, and I had always planned to try it, but I never did.
I watched a bunch of YouTube videos on how to do it, because unlike The Internet (which is a liar) and Facebook (which is designed specifically to optimally circulate lies for advertising purposes), YouTube is pristine. In YouTube, you don't get someone holding up a pipe and saying, "I made this with just a toothbrush and a paper clip, and you won't believe how!" and then you have to click through a 20 page slideshow that wants permission to scrape all your friends' contact information and to make postings for you and in the end, you have no idea how it was made, but you sure know how to save money on car insurance.
No, on YouTube you can actually watch the person make the object. And learn how. Though sometimes you have to watch 5 seconds of an ad at the beginning that you can click through. My favorite part is that you can watch at different speeds. I watch almost all YouTube video at 1.5x speed, so I can learn 50% faster!
I'm going to start rendering all my YouTube videos at 67% speed so that selecting 1.5x brings you back to normal. OK, not really. But some day, I will have some pipe making videos of my own. Not yet, as I'm still not good enough at it to teach anyone. I've made a grand total of five pipes so far, of which I would say two are very good, two are so-so, and one sucks.
I decided to start out slowly. I ordered two "Ebauchon bent" pipe kits from Vermont Freehand, which seems to be the only real supplier that has a web storefront of most anything you need for pipemaking. I have continued to get all my supplies from Steve at Vermont Freehand, though I've graduated up from the kits.
What makes a "kit" is that the wood block is pre-drilled and the stem is pre-fit. Drilling the wood isn't all that complicated, though there are a couple tools that make it easier. You have to drill the 1/8" air hole from wherever you want to put the stem to wherever you want the bottom of the tobacco chamber to be. Then you have to drill out the tobacco chamber with a rounded bottom just to the depth of the air hole - which means you get a normal spade bit and grind off the end of it into something like a 1" radius arc. Then you come back and do a 5/16" bore into which to fit the stem, and then use something like a forstner bit to flatten the wood where you drilled the stem bore so the face is exactly perpendicular to the bore, though VF sells a combined forstner with 5/16" drill bit through the center that does this in one step.
Fitting the stem is actually much harder. They come rough - right out of the mold with mold lines on the sides and kind of a random diameter at the shank from design-to-design. I still stink at this step, but we'll discuss that on pipe #5...
I got the kit to avoid this trouble. I got ebauchon because it's a cheaper cut of wood (being more from the center and having less dramatic grain), and I didn't want to throw money away on plateaux on stuff I'd probably mess up the first few tries.
Years ago when I had first researched pipe making, I watched a YouTube series from a guy who claimed you could carve pipes with basically nothing more than a few hand files and a vice. I can't for the life of me find those videos anymore, but I bought a vice. I'd always needed one. I already had files (though I bought a few more). I didn't want to buy a bunch of woodworking tools if I was going to stink at pipemaking.
I didn't expect to ever start blogging (or vlogging) again, so I didn't do a great job documenting these first few pipes. But, I used to share the photos of each stage with friends, and one of them was adamant that I put them on The Internet. So, you can thank the Korn Kob for my return.
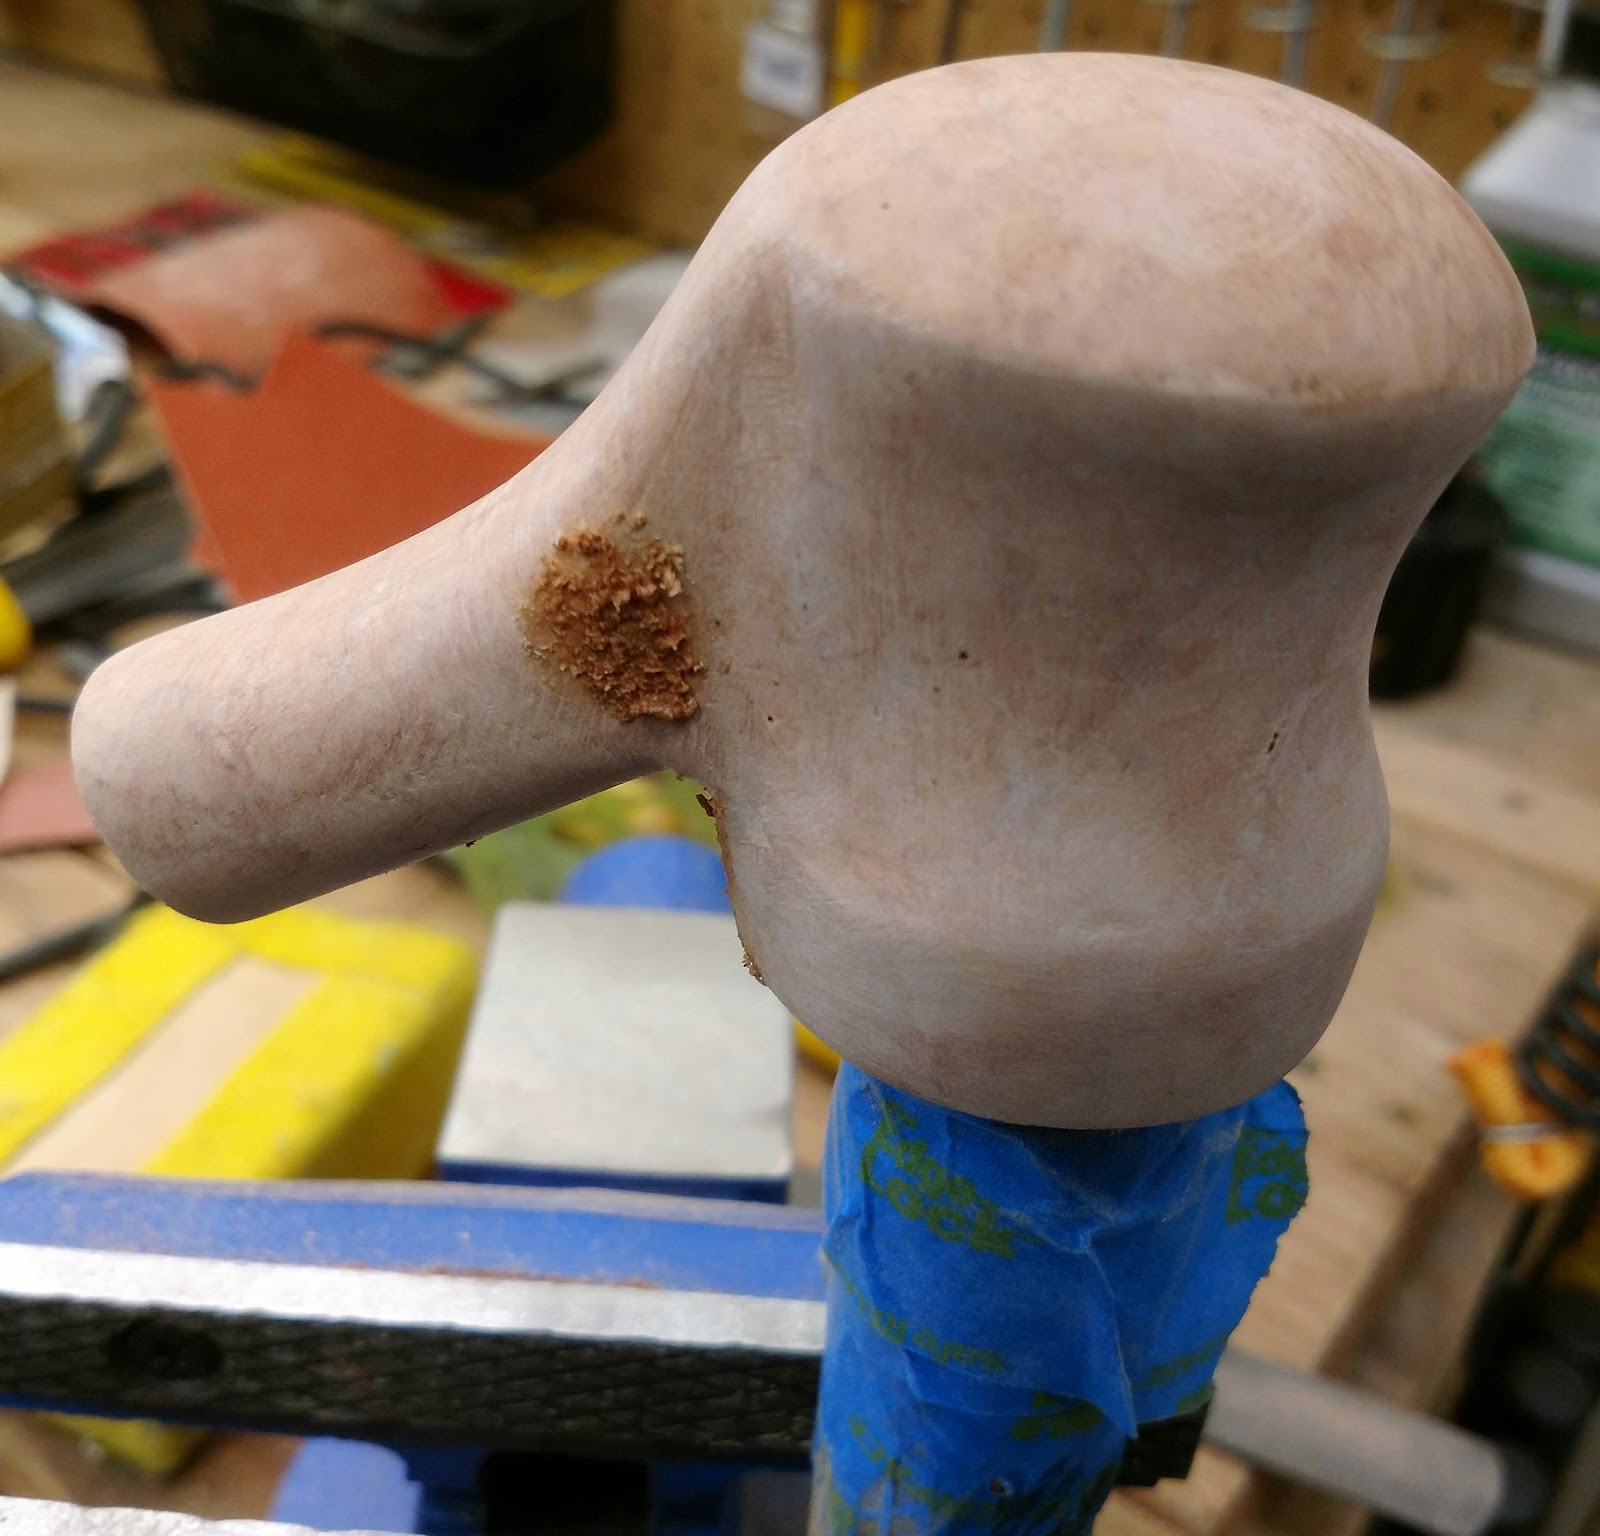
Here is the pipe kit before I have done any work to it. It's just a drilled block of wood with a straight stem fit to it. I remember from the "files and a vice" guy that the way you hold the "stummel" (which is what the wooden part of a pipe is called) is with an old broomstick in a vice that is stuck into the tobacco bore. I wrapped this one in blue tape as it was a little too narrow for the bore.

I drew some rough "pipe shaped" reference lines on the outside of the briar block, then I went to my crappy band saw to rough cut. This band saw is junk. I had spent hours adjusting the thrust bearings using a feeler gauge and had put on a brand new blade, and still, it can't follow a line. Both sides of this were supposed to be cut identically, but the saw blade likes to wander randomly. I've largely stopped using the band saw anymore. I should throw it in the garbage, but maybe I can pass it on to some cub scout parent who needs to "help" his scout make a pinewood derby car. That was what the original owner of this saw got it for, then he sold it to me cheap when his kids got out of cub scouts, and mine was getting into it.


Here we are now after literally hours of working on this thing with files and rasps. I later learned that coarse wood rasps are not a very good tool for shaping the briar, as they leave deep gouges that take forever to sand out. You need to stick with the "fine" side of a wood file.


The other thing I decided was, "Screw the European YouTube guy and his stupid hand files. I'm an American. And as an American, it is my God-given right to apply power tools." Especially given all the deep gouges I had in the wood from the rasps...
Now, another little aside. This combination belt/disc sander from Harbor Freight is neck-and-neck with the band saw for crappiest power tool I own. I think this one is actually the second crappiest tools, but only because it actually does function as a sander. You know, until you have to change the belt, in which case you discover that the casing has to be disassembled to do that (around a dozen little machine screws), then when you go to put it back together after changing the belt, you discover that the seemingly identical machine screws are actually three different lengths (in about 1/16" increments), but there's no diagram anywhere telling you which screw lengths are needed in each of the identical-looking holes. So you go by trial and error trying to find screws that will both go in all the way and bite into something. And finally, you decide out of frustration that it doesn't need that many screws, and you gently place the remaining screws somewhere over there via air express flight.
If there's one thing you take away from this post it is do not buy this sander. I don't care that with a coupon it's only $35. You see that beautiful miter gauge slot on the disc sanding shelf. Take a close look - it's not parallel to the sanding disc, and it can't be. The mounting point for it is cast at an angle. Such an angle that out of the box, the shelf scraped on the disc, though the disc has sanded the edge off it now.

I would call this significantly improved. Note that the second picture is showing you the worse side that had all the holes I circled in red on a picture above. You can really see the grain of the briar burl start to assert itself in these photos. The totally random grain patterns is one reason burl is popular for pipes. It's very artsy.


Now comes the staining. For pipes, you use an alcohol-based stain. I don't remember why, exactly. Don't want to raise the grain, perhaps. The most common alcohol-based stain is Fiebing's leather dye. It comes in a ton of colors. I decided to do the top in just tan, and then the remainder of the stummel in a couple deep burgundy base coats with a couple layers of tan over them. I was trying to make the grain really pop. In the photo, I've applied two red coats and two tan coats, and I've just ended up obscuring the grain - the opposite of what I wanted. Though you can clearly see the contrasting rim that just has tan.

Alcohol-based stain is really cool in that it not only dries super-fast, but you can really thin it out by wiping it with a little rubbing alcohol. I rubbed it all down, which almost took it all off, then went with one red and one tan.

Now, it's time to bend the stem. This is done with a heat gun (I used low heat setting), and a bath of ice water to plunge the stem into to set the bend. If you mess it up, you just reheat and do it over. The only think you can really mess up is you can bubble the vulcanite if you use too high a heat for too long. But you'll bubble your finger, too, if you do that. Oh, and you're supposed to put a pipe cleaner into the air bore before bending in order to prevent pinching off the bore. If you forget that step, i'm not sure you can recover from it.
I took a couple tries, but I got the curve I was looking for. Some recommend making a bending jig so that you can exactly get the curve you want. I kinda tried this using a few different cylinders, but I found it was easier to just freehand bend it around the curve of my thumb. One interesting thing is that after I finished my second pipe stem, I laid it next to the first, and they had nearly identical curves. Apparently, the curvature of my thumb when I bend it back is a constant...

Now time for more power tools. I have a drill-mounted polishing kit (also from Harbor Freight) that has a couple felt pads on drill shafts, and a couple types of polishing compound. I selected the "white diamond" compound which I hear is equivalent to 800 grit, though different pipemakers use different compounds (red tripoli also being popular and about 400 grit and is probably the other compound in the kit). Some even use both, but you have to have a different polishing wheel for each type. The people who address this head on mostly claim it makes no real difference which compound you use. It did shine it up quite a bit more than I expected given that I'd worked up to 1500 grit sandpaper, so an ~800 grit polishing compound you'd expect to make it rougher rather than smoother, but the high speed of the wheel really beats anything you can do by hand.
You have to polish both the wood and the stem.

Time to look at the flaws that aren't going to buff out.
I have a little gap at the stem fitting because I decided to sand the mating surface a bit. Everyone tells you not to do this cuz you'll never be able to sand it perfectly flat and perfectly perpendicular to the stem bore. You can add me to that list of everyone. Don't do it, or you'll end up with a gap like this.
Also, where the shank meets the bowl I had been going at that pretty hard with a rat tail file to shape it. It turns out it's really tough to sand an inside double-radiused curve like that, so you can still see the rough slash from the file. I never really figured out a good way to sand something like that (used sponges and fancy radiused sanding blocks, but pft, no). On future pipes, I was conscious of this limitation and designed it out.


The "bad side" of the pipe still shows the patch right where the shank meets the bowl. It's better than it was when it was not filled and leaked air, though.
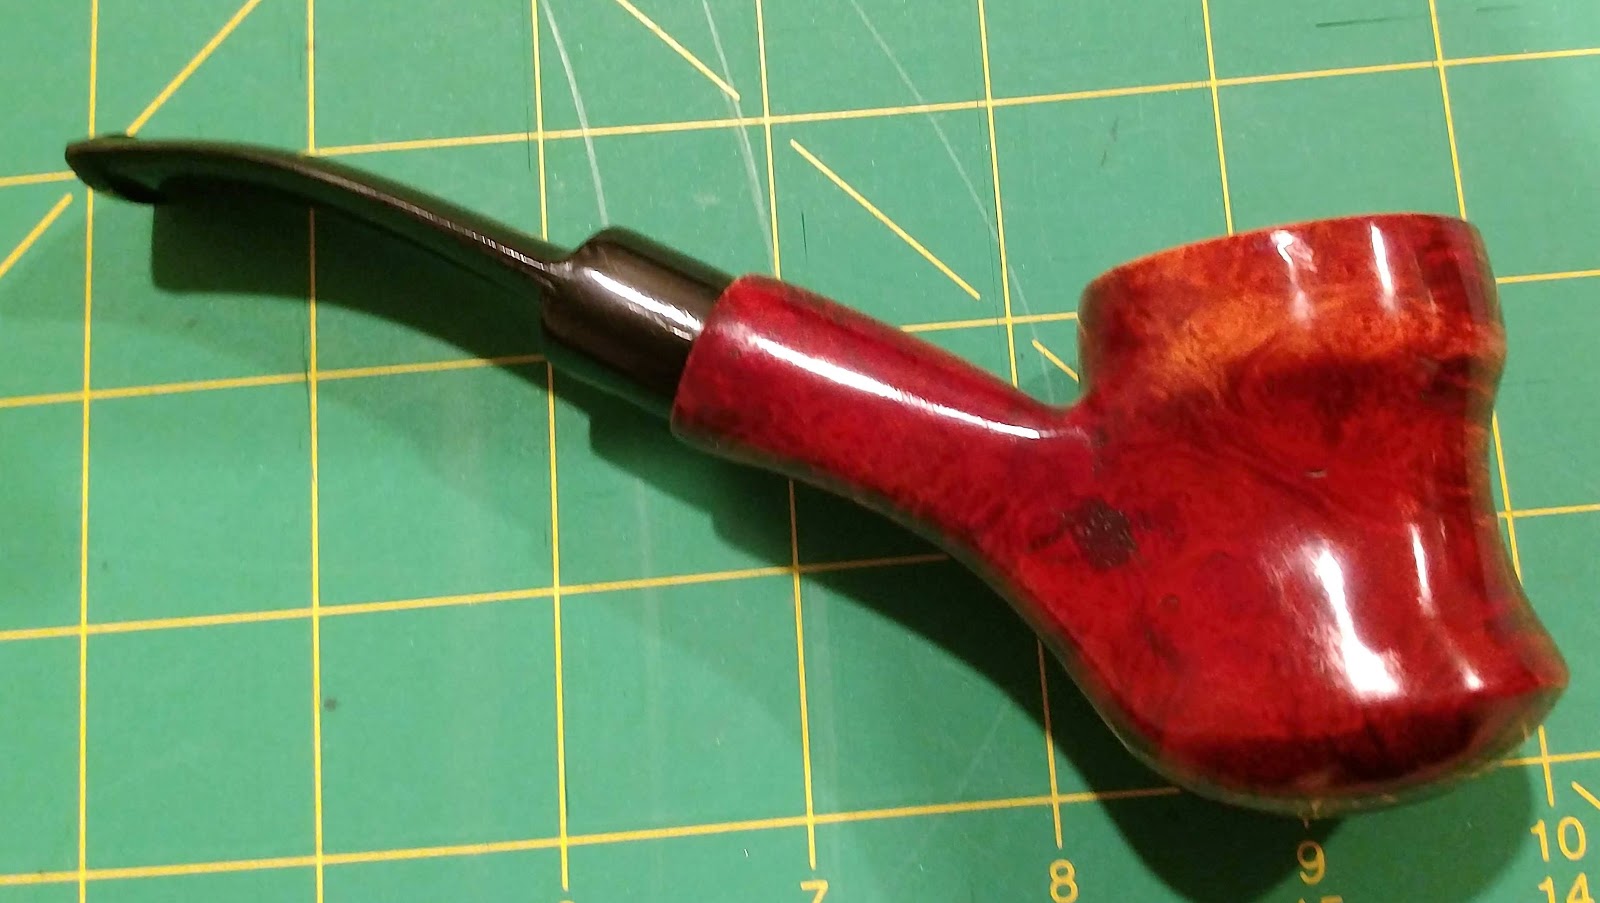
There you go. My first pipe kit built into a pipe using nothing but a vice and some files. And a belt sander. And a heat gun. And glue. And a broomstick. And polishing wheels. And a drill press. Total labor time on it was around 23 hours, though that spanned a few days.
I've still never smoked this pipe. I kinda want to keep the first one pristine.
My always-supportive family christened this pipe "Toilet Pipe" because they think the bowl is shaped like a toilet bowl.
